Cool Tools: Wood Carving Set


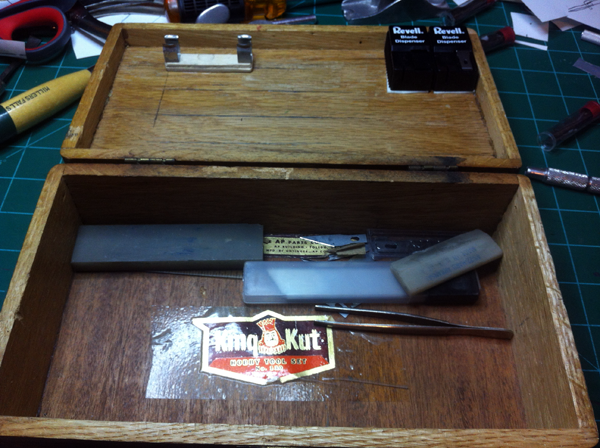
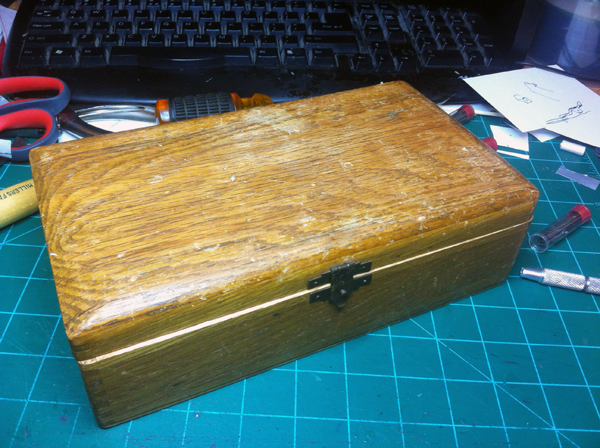
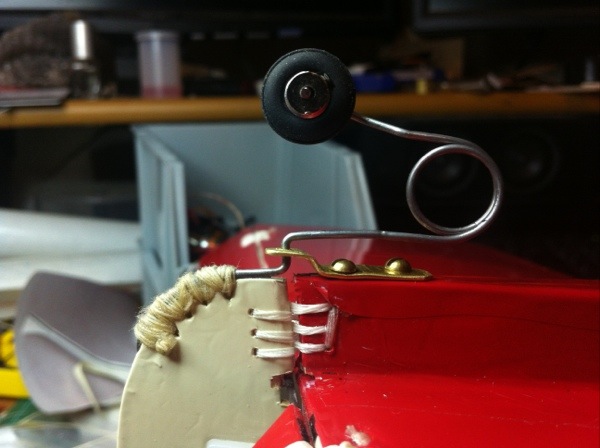
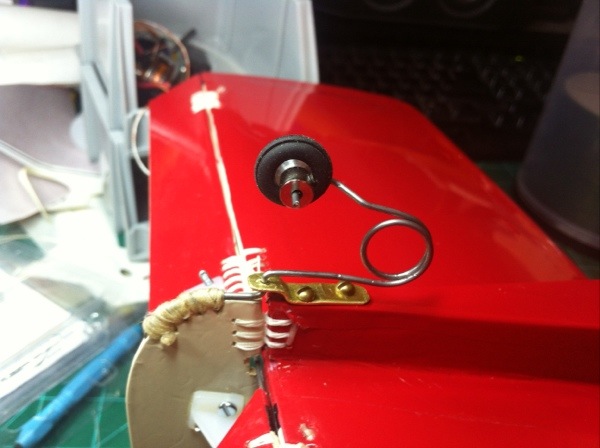
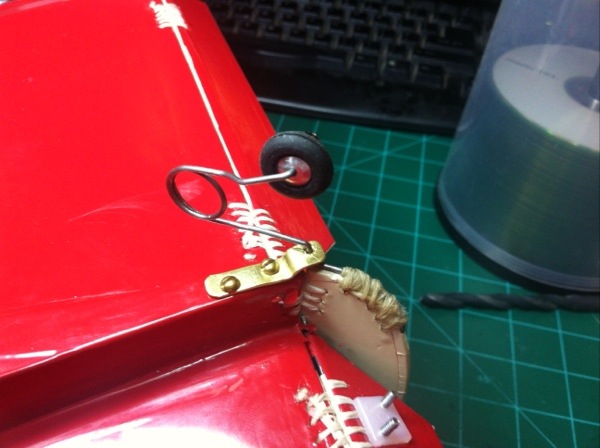
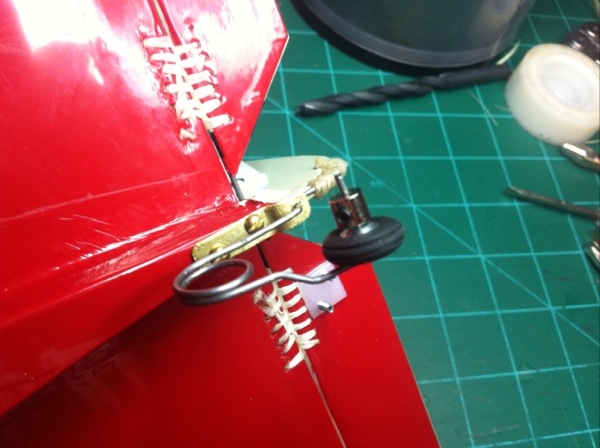
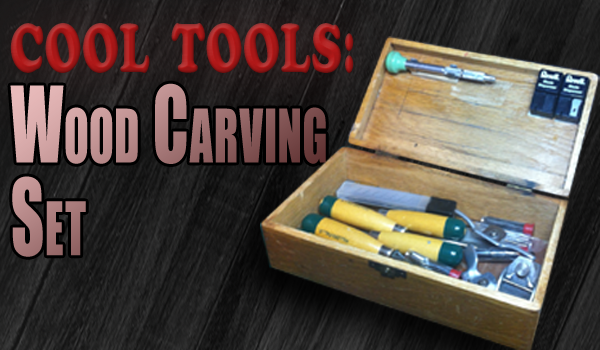
A few years ago my grandparents gave me this really cool set of woodcarving tools. They belonged to my grandfather who used them for, well, wood carving! I’ve seen some of his carvings and they are incredible. One carving that I remember well was a wooden ball that rolled around in a little wooden ‘cage’ . . . the cool part was that it was made out of a single piece of wood! There are some pretty unique tools in this set that have come in handy over time.


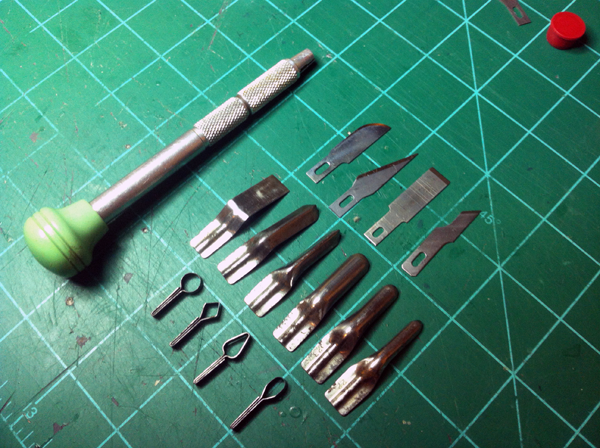
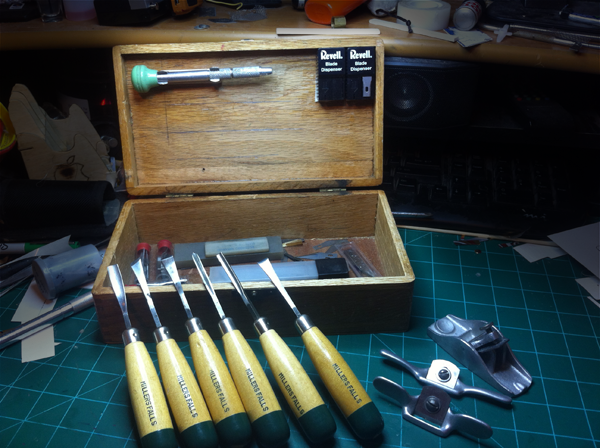
Now these aren’t tools that I use every day, or every week for that matter, but there are times that something in the set has been the right tool for the job. The set contains six wood chisels, two draw knives, a mini block plane, a hobby knife handle, and many blades for the hobby knife.


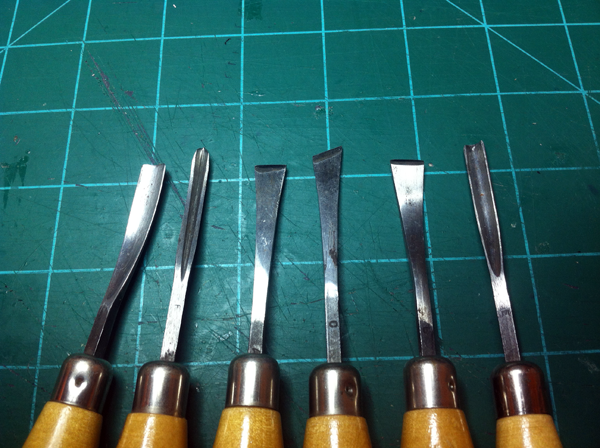
Probably the most used tools in the set are the wood chisels. These work great when I am working on something small and I need to make a groove, a small mortise, or something like that in the wood. Each chisel has a different shape to it. The shapes are as follows: a straight, flat edge with a straight shaft; an angled, flat edge with a straight shaft; a straight, flat edge with a curved shaft; a shallow curved edge with a straigt shaft; a tightly curved edge with a straight shaft; and a ‘V’ shaped edge with a straight shaft. Each of these have been useful in different situations. The one that I seem to use the most is the shallow curved edge chisel. Probably because it has been the sharpest here recently 😛


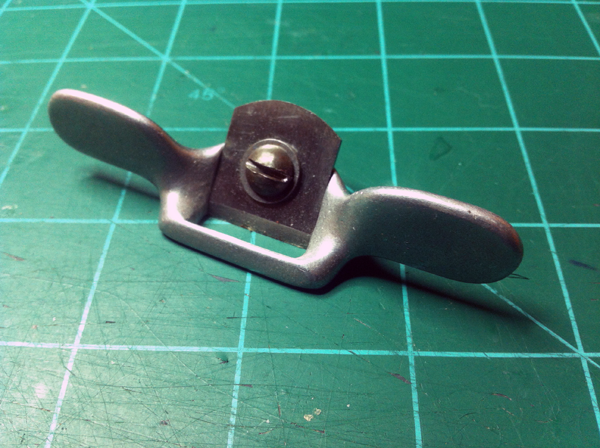
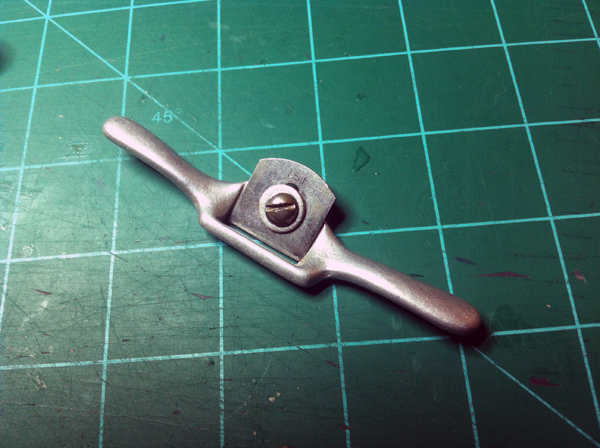
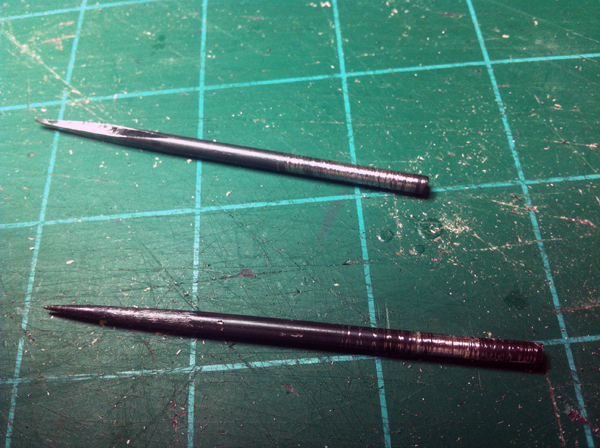
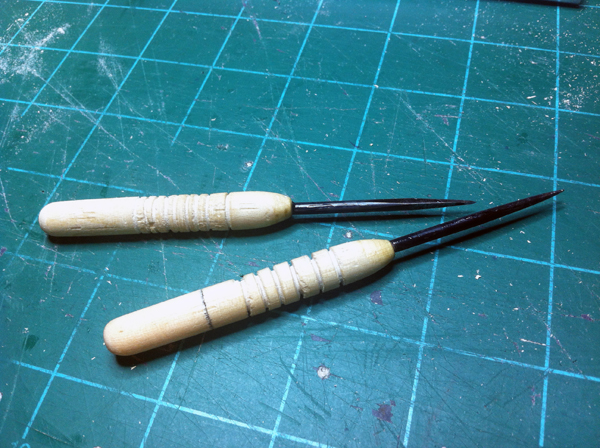
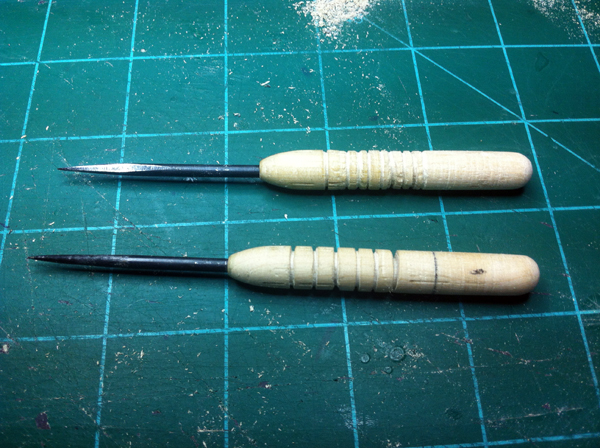
Some other tools that are in the set are the draw knives. I’ve used these a few times for shaping balsa and other little things, but I don’t use them too much. I feel like one of these days I will be like “Oh yes! I have little draw knives that will be perfect for this!”.


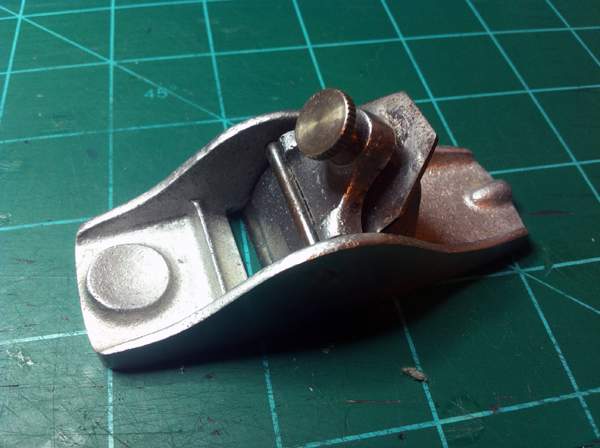
Another tool is the small block plane. This has got to be my favorite tool in the set. It’s not because it is the most used (which it isn’t), but it’s probably because it is just so small. I’ve used this in the past and it seems to work well.


And the last set of tools that are in the set are the hobby blades and handle. The hobby knives and handle together are pretty cool. There are some interesting blades that are in the set. Some of them look like they would be used like chisel and there are some blades that are bent in a circle or a diamond shape for unique situations.


This is a really good set of tools to have. There have been many times where I don’t know what I would’ve used if I hadn’t have had a certain tool that was in this set.


Posted in Cool Tools, Uncategorized Tagged 130, black, blades, blockplane, Box, carve, draw, exacto, hobby, king, knife, knive, knives, kut, No., No.130, plane, razor, set, tool, tut, wetup, wood, woodcarving, xacto 1 Comment

.45 Evolution Nitro Engine Cleanup

;

So sitting in my attic for the past ~8 years or so is a .40 sized RC trainer plane. It has been flown like only once about 8 years ago. I haven’t attempted to fly it because I really don’t the the right size of field at my house, but since I learned that there is a local flying site, I figured I should get ‘er down and get it ready to fly. I knew the engine hasn’t run in many years, so I cleaned it and I am now in the process of trying to get it running smooth.

When I took the engine down off the plane, it wasn’t in really bad shape, but it sure wasn’t in good shape either. Upon first inspection the carb was gummed up to the point that it wouldn’t let the throttle lever move. Also, when I had to remove the muffler I realized the gasket was pretty much toast. I opened up the back and noticed the con-rod was gunky around where it met the crankshaft, and when I looked down the venturi I notices that the crankshaft was also covered in gummed up castor oil. So, this is where my work begins…

I used denatured alcohol to cut through all the gummed up, close-to-10-year-old castor/synth oil. To get the air intake on the carb able to spin, I put a few drops of alcohol in it and let it sit while I cleaned the inside of the engine. I used Q-tips (cotton swabs), cotton balls, and paper towels to clean the engine. I used q-tips to clean the crankshaft through the Venturi hole and also used them to clean the con-rod connections. After I cut off the old gasket with an X-acto knife, I cleaned around where the muffler attaches and cleaned the side of the piston.

After cosmetically cleaning the outside of the engine, I went back to working on the carb. After sitting for about 10-15 minutes, it was finally able to move. I use Q-tips to clean the whole carb. I then moved the throttle lever back and forth repeatedly to get it ‘broken in’. While doing this I would often add alcohol to the carb to help cut through any remaining oil.

After cleaning the carb, I reassembled the engine. I then like the engine to prevent any more trouble. Sunday evening I attempted to get the engine running. I got it to run in short 30 second bursts or so, and once I figured out why it kept dying (old fuel in the gas tank that mixed with my new fuel), my glow igniter went dead on me. So now I am jus waiting until I have time to mess with it some more. I’m pretty sure it will run fine with some all-fresh fuel. But we’ll see. . .

;

;

;

;

;

;


Posted in Remote Control Tagged .45, 40, assemble, c, clean, cleanup, dissasemble, engine, evolution, nitro, r, RC, size, up

Circuit Board Reamer 2.0

I was working on a project the other day, and while trying to make a hole just a little bit bigger, one of my most used tools broke on me! My Harbor Freight Circuit Board Reamer handle broke in half. Now you’re probably thinking something along the lines of, “Well you must’ve really been using it wrong to break the plastic handle”. Well, I really wasn’t. I was very surprised when it started to break because I was using very little effort. I guess you get what you pay for. Anyway, I wasn’t about to just throw away one of my favorite tools. I mean the metal reamers are still working great, I just needed a new handle. So that’s what I did, I fashioned a new handle for each reamer side.


As you can see, I made two separate tools out of one because it is easier to use. I could’ve made one, double ended tool like the original, but I though this would be a little better in the long run.


To make the new handle, I cut a piece of wooden dowel 2-1/2″ long. I planned on using a drill to spin the wooden dowel (kinda like a lathe) so I put some electrical tape on one end so the drill’s teeth don’t mar it up too much. After I had the dowel spinning in the drill, I used a pin-vise to hold a drillbit the same diameter as the reamer tool and I brought the drillbit to the wood and began drilling. So with this setup the drill bit stays stationary and the dowel is actually the one doing the spinning. The reason I had the dowel spinning is so I could get the hole in the very center of the dowel.


After driling the hole that the metal tool will go into, I grabbed a rasp to begin shaping. With the dowel still spinning, I used the rasp to taper the end that has the hole we just drilled in it.  After that, I added grooves for grip. I created the grooves by spinning the dowel in the drill and using a hacksaw blade to slowly cut away the wood. The holes are just eyeballed. I spaced them and cut their depth at whatever looked good. I then used 220 grit sandpaper to clean everything up. I then took the dowel out of the drill and removed the tape. I then put the dowel back into the drill with the hole going into the drill first. I was careful to barely tighten the drill so I don’t damage the wood. I then spun the dowel and rounded and sanded the back-end of the handle.


At this point the handle was completed, I just needed to install the metal tools. Before gluing in the tools, I used a file to rough up the ends of the tool that were going to be glued. I filed grooves, I scratched it all up, and I also filed a flat spot to prevent the tools from rotating. After that, I mixed up some epoxy, and glued the tools down into their handles. Aside from the epoxy curing, the new and improved tools were finished.


Posted in Tools Tagged 2, 2.0, board, build, circuit, Fix, freight, glue, harbor, lathe, reamer

Steerable Tail Wheel

20130205-000024.jpg

I’ve been working on my balsa airplane and I’m almost finished! I still have quite a bit of ‘finishing touches’ to do, but I’m getting pretty close to flying it. One thing I built for the plane was a steerable tail-wheel. The steerable tail-wheel was easier than I thought it’d be, and I think it looks kind of cool.

For the tail wheel itself I bought a Sullivan 1/2″ tail wheel from the hobby shop. At the hobby shop they sold steerable tail wheel brackets, but I didn’t see it necessary to buy one when I had the stuff at home to build my own.

To build the bracket I cut a piece of brass about 1/4″ wide and about 1″ long. It’s probably 1/32″ or so thick. I took this piece of brass, and after smoothing the edges with a file and sandpaper, I bent one end of it up a little. I then drilled three holes in the brass. One hole for the wire that will be the wheel axel and two holes for screws to mount the brass to the airplane. I then attached this bracket to the plane with some small wood screws. I then began working on the wheel axel.

The rest of the steerable tail wheel assembly pretty much consists of music wire. The commercial versions of a tail wheel have a spring coil in the wire to absorb shock on the ‘less-than-perfect’ landings. I knew I needed to incorporate one of them :P. The first thing I did was began working on the spring. I used a drill and a drillbit to make the spring coil. (The method on how to do this is too long to describe here. If everything goes as planned I’ll show you how to coil your own spring next week…or the week after…) After I had finished the spring coil I bent the wire to accept the tail wheel. I had to bend it kind of funky so the wheel would be in the center. I couldn’t just make a simple 90 degree bend or the wheel would be on one side of the wire – not the center. After doing this, I slid the wheel on (the wheel did have to be drilled out a little to accept the size of wire I was using) and then I slid on a wheel retaining collar purchased from the hobby shop. When I was putting the wheel collar on, I put some clear finger nail polish on the set-screw as a type of poor man’s Loctite thread locker. This is so I don’t lose my wheel mid-flight. After that I did some more bending on the wire so it would go through the brass bracket and then curve around the edge of my rudder. It is important to make sure the wheel is directly below the rudder’s hinge line to give the best rotation. On the very end of the wire I made a bend so about 1/8″ of the wire actually goes into the wooden rudder.

To secure the wire to the rudder I used thread and superglue. I drilled five small holes along the rudder edge, and using an embroidery needle with 3 doubled up strands of cotton thread (which created 6 ‘strands’), I sewed around the wire and through the rudder. I then doused the thing in thin CA (superglue) to make it strong. I recommend thin CA because it wicks up into all the cotton strands and balsa wood and makes it extremely strong.

So that’s it. Sorry I don’t have any mid-build pics. I guess I got too caught up in building that I didn’t take any pictures. . .

20130204-235859.jpg

20130204-235911.jpg

20130204-235923.jpg

20130204-235933.jpg

20130204-235943.jpg

20130204-235953.jpg

Posted in Airplanes Tagged airplane, build, diy, how, plane, RC, steer, steerable, tail, to, wheel

Covering Balsa Plane

20130128-231653.jpg

So I was going to show y’all something I built this week and show y’all how to make one yourself, but I went to the hobby shop this afternoon and got side tracked by some of the goodies I bought. Today I got in the mail my first covering iron – a Coverite 21st Century covering iron. This afternoon I had to run some errands and while I was out I went to the hobby shop, and among other things, I picked up some Ultracote for my Minnie Mambo build. I didn’t get home till late this evening and I really wanted to try covering a balsa airplane, so I did.

I’ve only got the horizontal stabilizer covered and it still needs some black trim, but I thought I’d show you all anyway because I am extremely happy with the way it came out. . . Especially since it was my first time doing it.

Doing the covering is a lot easier than I had expected. I had my iron set to 220F when I attached the Ultracote to the balsa and I had it set to 325F when I was getting out wrinkles and shrinking the covering. I also used the sock that it came with.

So yeah, that’s pretty much it. Sorry I don’t have a more in depth post of something that is finished, but I just couldn’t wait to try out my new iron and try my hand at covering. Anyway, I know you’ll probably be reading this sometime Tuesday morning (maybe) but I’m writing this late Monday night and I don’t have time to photoshop an image for the top of the post because I am going to bed. . . 😛

Pictures. . .

20130128-230953.jpg

20130128-231001.jpg

20130128-231015.jpg

20130128-231023.jpg

20130128-230934.jpg

Posted in Airplanes Tagged airplane, cover, covering, how, iron, ironing, monocote, monokote, plane, RC, seal, sealing, to, ultracote

Ping Pong Ball Launcher ver.2


I was able to find time this week to perfect my ping pong launcher a bit more. I updated the launching wheel, motor mount, I built a ‘ball limiter’, and I found a hopper to use. It’s still needs more work, but it’s a start.

The old motor mount was big and bulky. Although it gave me an adjustment for the pressure on the ball, it wasn’t necessary. The main problem, aside from weight, was that it would move on its own quite often. I made a new motor mount by molding some InstaMorph plastic into something that will clamp the motor in place. I then hotglued the plastic mount to the PVC pipe. Oh, by the way, I’m using the same piece of PVC pipe as I did for the last one. I just ripped the old motor mount off.

For the new and improved wheel I am actually using a K’nex wheel. It has a very wide rim and is very strong. While spinning at full speed the rubber would try to ‘walk off’ the rim, so I just hot glued it to the rim. This wheel works much better than the old!

The ball limiter is pretty simple. I used a servo that I modded for continuous rotation and I attached to it a mason jar canning lid. On the lid I cut out like 1/3 of a 40mm circle. This semi-circle that was cut out is the same diameter as a ping pong ball. In the PVC pipe I cut a slit with my Dremel for the lid to stick into. You can see this in the pictures easily, but, what happens is a ball that is in the tube will touch the lid as it spins around. When the semi-circle opening gets to the ball, the ball will fall in, move with the lid, and be pushed out on the other side of the lid. Not only does it limit the flow of the balls to the launching head, it also forces the balls into it.

I control the servo with a servo testing box that my brother actually built for me. With the box’s potentiometer I can change the speed and direction that the servo rotates.

The last thing I did was find a hopper. I’m using the top part (or bottom part, sending on how you look at it) or a 5gal water jug. You know, those jugs that go into the top of a small water dispenser. It works well because it holds a good amount of balls, it is funnel shaped, and the central hole is the right diameter for a ping pong ball.

So that’s all I got done for it so far. It’s still a work in progress. I need to build a stand for it and I really need to upgrade the motor if I’m serious about it. It really needs a quiet brushless RC motor and an ESC (electronic speed control) to control it. My DC motor is really loud, vibrates a lot, and isn’t ideal. So maybe when I get the funds I’ll by a good motor for it. We’ll see. . . . .


Posted in Just For Fun Tagged 2, back, backroom, ball, build, desk, diy, home, homemade, launch, launcher, limit, limiter, made, Ping, pong, robot, room, server, sling, table, tennis, ver, version, work, workdesk

DIY BEC


On my Minnie Mambo build thread over on RCGroups.com, we were discussing what kind of battery that should go into the plane to power the receiver and servos. A normal sized flight pack is way too heavy for this size of plane, so one guy suggested using a BEC and a 2s Lipo battery. A BEC is a Battery Eliminating Circuit. It takes a voltage over 5 volts and it will drop it down to a constant 5 volts to power the receiver and servos. For example, a 2s lipo is a little over 8 volts when fully charged. A BEC will take the 8v and drop it down to 5v for the RX and servos. Well, you can buy one of these for like $10 or so, but like many things, I made my own.


Building the BEC was surprisingly easy. I am not an electronics expert by no means, so I just Googled it. I found a simple schematic on how to build one, but I had none of the parts it called for. I called my brother who is currently studying to be an Electrical Engineer and asked him if there were any substitutes. It turns out that I could substitute what the schematic called for with what I had. I ended up using a 7805 voltage regulator, two 47uF capacitors, a servo lead, and a JST connector. If you would like to make a BEC for yourself, I have attached a schematic below that you can follow.


When making the BEC, I didn’t have any perf-board on hand, so I just soldered every thing up loosely. After soldering everything up, I put some electrical tape around all of the solder joints. I then took a large piece of heat shrink and slid the soldered components into it, but I left the voltage regulator sticking out. Then for protection, I pumped some hotglue into the large piece of heatshrink and then I shrunk the heatshrink while the glue was still melted. This was to protect my solder joints and the capacitors. I left the voltage regulator sticking out because when there are a lot of servos hooked up to the receiver and they are all moving, the voltage regulator can get hot. For this reason, I slid a heat sink onto the exposed voltage regulator.


I hooked up my RC gear and tested it out. It worked! On my airplane I will only have 2 servos, but as a test I hooked up 6 servos to my receiver and moved them all simultaneously. When I did this, the voltage regulator did get quite warm, but quickly cooled down because of the heat sink. The voltage regulator did not get hot when I had just two servos hooked up to it. One thing that makes me happy is the commercial version of the BEC weighs 9 grams and my homemade version weighs 10 grams! I’m only 1 gram off!


Here are some pictures and a video!

(I forgot to take a picture of my solder joints. . . )


Posted in Electronics, Tools Tagged 5, 5v, 7805, amp, ampere, amperes, amps, B, back, backroom, backroomworkdesk, battery, bec, build, c, circuit, d, desk, e, eliminating, five, flight, home, homemade, i, made, pack, regulator, room, schematic, solder, voltage, volts, work, workdesk, y

Minnie Mambo Balsa Build

For Christmas I got a box of balsa and I am currently in the process of building an airplane with it. I started building the airplane about a week ago and I have got quite a bit of work done on it. This is my very first balsa scratchbuilt airplane and I am learning a lot! The airplane is a Minnie Mambo. The Minnie Mambo was manufactured by Sterling back in, I think, the ’60s. It was originally powered by a Cox .049 and controlled with a one channel transmitter! For controlling the rudder the airplane calls for an escapement which is a really old servo-type thing that is actually powered by a wound up rubber band. Remote Control gear has come a long way since the sixties so I am building my Minnie Mambo slightly different. I am going to use two digital 9g servos for controlling both the elevator and the rudder. I will, however, stay with the same engine – a Cox .049 Sure Start. So the plane will have a little both worlds: an old power system, but with new radio gear.

So far for the build I have got quite a bit done. I have the wing finished, I have the horizontal stab built, and right now a few of the fuselage formers are bein glued into place. If you’d like to see updates on my build throughout the week, you can ‘like’ my Facebook Page. I also have a build log thread over at RCgroups.com. You can check out that thread here.

I’ll have plenty more to learn as I finish the plane up. Like doing my first covering job on a balsa plane and how to fly an un-throttled 1/2A plane!

I’ll leave you with one picture of the fuselage glue-up progress, but if you want to see more pictures, like the completed wing, you will have to checkout my Facebook Page.

;

20130108-010427.jpg

Posted in Airplanes Tagged /, 1, 12a, 2, a, air, airplane, back, backroom, Balsa, build, c, control, d, diy, engine, fly, flying, home, homemade, Line, made, mambo, mini, minnie, mod, plane, RC, remote, room, sterling, work, workdesk

Ping Pong Robot ver.1

For Christmas my siblings and I got a ping pong table. Now we don’t have it setup as a ping pong table, instead we have the playing surface resting on the kitchen table. This kind of turns our kitchen into a rec-room :P. Most people when they get a ping pong table might think “Awesome! A ping pong table!”, but I thought “Awesome! I get to build a Ping Pong ball serving robot!”

Friday night, I think it was, is when I began to work on my robot. I headed out to the shed and came back with 3ft of 1.5″ PVC pipe and various fittings. I then gathered materials to build the launcher head: a DC motor, an RC airplane wheel, and a Harbor Freight clamp.

To build the launcher I hotglued the DC motor to a clamping surface of the clamp – I glued it to the surface that is not connected to the squeeze handle. Before I glued it, though, I covered most of the clamp with painters tape. I did this so that when I was done with the project I could just remove the tape and have a ‘brand new’ looking clamp as there would be no left over hotglue. After I mounted the motor to the clamp, I took the RC plane wheel and pushed it onto the motor’s shaft. This wheel will spin and grip and fling the tennis ball. Now I know with just one motor the spinning wheel will induce pretty heavy spin onto the ping pong ball which will make it difficult to return, but right now I’m just trying to get a launcher and then I’ll go from there.

Next,I took my Dremel with a cut off wheel and I cut out a 7/8″ x 1-3/4″ opening into the 1.5″ PVC pipe. This is where my wheel will be spinning so the ping pong ball inside the tube can be gripped and flung. Now my problem with mounting this motor and wheel is that I’d like to adjust the pressure on the ball, or in simpler terms, move the motor up and down in relation the opening in the pipe. I thought for a while on how to do this easily. I didn’t want to have to make some type of screw assembly that I could turn to adjust the motor so that is where the clamp comes in. With the motor mounted to the clamp, and the clamp mounted to the PVC pipe, I can raise and lower the motor by squeezing the clamp closed or i can release the clamp to raise the motor. So obviously my next step was hot gluing the clamp onto the pipe.

At this point my launch head was finished mechanically. Now it just needed power. I soldered on some wires to the motor with a barrel jack on the end. I then plugged the motor into a 9v 1.5a transformer I have and I spun up great. After playing with the tension of the motor to the ball, I could launch a ping pong ball from anywhere to 20 feet of more, down to a distance (and speed) that was typical in a ping pong game.

Now this launcher head is very rough. One major problem is the wheel. When the motor spins up, the soft foam rubber wheel expands greatly due to the centrifugal forces. I will need to find a much sturdier wheel that I can use. Also, I need to build a hopper and a way to dispense the balls one at a time. You will probably see more about this project in the future.

Happy New Years!

20130101-022425.jpg

20130101-022441.jpg

20130101-022455.jpg

20130101-022506.jpg

20130101-022518.jpg

20130101-022528.jpg

20130101-022541.jpg

20130101-022552.jpg

Posted in Just For Fun Tagged back, backroom, ball, build, c, control, d, dc, desk, diy, home, homemade, i, joola, launch, launcher, machine, made, motor, Ping, pingpong, play, pong, practice, robot, room, self, serve, servo, shoot, shooter, spin, stiga, table, tennis, throw, thrower, work, workdesk, y

Merry Christmas . . . and a special project


First off. . . Merry Christmas!


I have been pretty busy this week doing stuff with my family and working on a really big project. This special project isn’t finished yet, but it’s going to be awesome when it is. I am making a step by step Instructable for it so you will be able to make one yourself. I am not going to say what the project is, but if you can guess what it is I will give you credit in my next blog post. Just post in the comments what you think it is.


I have drawn this project up in a CAD software. Although I have not finished drawing it, I have uploaded a rendering of the project that you can look at. Like I said, see if you can guess what it is!


Merry Christmas!

Posted in Miscellaneous
  • « Older Entries
  • 1
  • 2
  • 3
  • …
  • 6
  • Newer Entries »

Proudly powered by WordPress | WordPress Theme Custom Community 2 developed by ThemeKraft